Posts

Writing and Testing in C# in Linux with Visual Studio Code.

Image
  Visual Studio Code is an open source IDE useful for developing in many different languages on nearly any platform. If you've ever used Eclipse, you'll find it similar.  There are many extensions you can add to it to allow you to debug, run, and test using nearly any tool you can think of. Since I'm focusing on C#, one of the first things you'll need is dotnet.  Using the Extension Manager, I've installed: .NET Extension Pack (from Microsoft) .NET Install Tool (from Microsoft) C# (from Microsoft) C: Dev Kit (from Microsoft) With those installed, you can now open the command pallet (cntrl+shift+p) and do things like create new projects.  However, to get access to some of the useful "Visual Studio Explorer" style menu items, you'll need to install that separately from Microsoft. It's available here: https://code.visualstudio.com/docs/?dv=linux64_deb What this extension allows you to do, is right click on a project and "add a reference" to ...

Limiting a Wacom Stylus to one screen in Ubuntu 24.04

Image
 I've been trying to switch from Windows to Linux, because Windows 10 is going out of support soon and they refuse to let me keep using my older, but perfectly functional PC. Much of my day-to-day development can be done on Linux with no problem. However, some of my tools need to change.   To that end, I have a Wacom stylus tablet that I like to use for writing notes. In order to use it properly, it needs to be limited to one screen. I have 5, and I'm using an NVidia driver, so many of the online solutions to make this work, did not work for me.  This did.  To find the active Wacom devices, make sure you either plug your Wacom device in, or configure it with a bluetooth adapter.  Then, open a terminal and type xsetwacom --list devices This will give you a list like this.  Yours will look different.  Next, you might want to see a list of your monitors.  To do that, you us xrandr --l...

Resolving "cmdline-tools component is missing" in Ubuntu 24.04 with VisualStudio for Flutter Development

Image
 I've recently been trying to switch from working mainly in Windows to working mainly in Linux, mostly because I'm currently running Windows 10, and would have to completely rebuild my PC in order to upgrade to Windows 11. My PC works just fine, and runs Ubuntu great.  That being said, I've ran into a few snags getting Flutter working on Ubuntu. Following the generic tutorials from the Flutter Docs  (here)  got me most of the way there.  The problem I ran into stems from (I think) the fact that Ubuntu switched from .deb packages to these things called SNAPS, which are self-contained apps. When searching for resolutions for specific problems, most of the online source has information that's now outdated.  That brings me to my issue. When I ran Flutter Doctor, I got an error complaining that the android "cmdline-tools component is missing" After much googling without luck, mostly showing me those "type this nonsense into your terminal", I found the ans...

Using routerLinkActive in Angular 17

Image
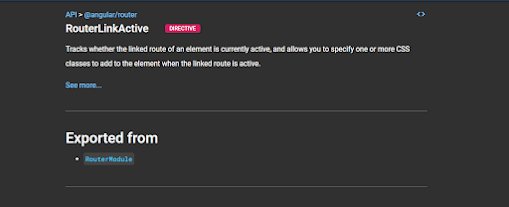
I'm re-writing an Angular app using Angular 17, which is a departure from the architecture of previous versions of Angular. If you found my page, than it's likely that you are trying to use routerLinkActive, and it's not working.  In Angular, routerLinkActive allows you to apply one or more CSS classes to an element if the element matches a route.  < a mat-button   routerLink = "/Home" routerLinkActive = "active" >< mat-icon > home </ mat-icon > Home </ a > In this example, when Angular route is set to "/Home", the <a> element will essentially be <a class="active"> So in your CSS file, which is in the same folder as your component, you need to define a class rule that tells the browser how to style the element.  In my case, my CSS file is top-nav.compenent.scss and I've added this rule: .active {   background-color : darken ( orange , 25% );   border-radius : 10px 10px 0 0 ;   color : b...

My "GeekZebo", using Arduino(ish) to control neo-Pixel lights.

Image
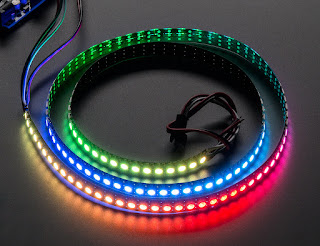
  One of my favorite things to do in the summer is listen to music on my patio. We bought one of those "fancy" metal gazebos that they sell at the home improvement store and put it on our patio to save ourselves from the mosquitos that swarm Minnesota in the summertime, and to allow us to enjoy the outdoors even in some of the more inclement weather that shows up here from time-to-time. I noticed that there was a tiny "shelf" above the mosquito netting that looked like a great place to install strip lights, so I thought - why not geek up the place while I'm at it. So I installed some neo-Pixels. What are neo-Pixels? If you're not familiar with neo-Pixels, at their core they're LED strip lights. What makes them extra cool is that they expose a way to address either a single LED (for most 5V systems) or a group of 3 LEDs (in a 12v system), and you can turn them on and off, or set them to any color you can think of. Once you set them, they stay that color u...

6 Reasons why you should use Visual Studio Code for Arduino.

Image
Did you know you could use a different IDE for Arduino? There is, of course, the Official Arduino IDE.   There's an Arduino Plugin for Eclipse . And if you haven't heard of it before, the very good Energia - that also works with many Texas Instruments Development Boards. There are also plug-ins for Visual Studio 2019 and other "full versions" of Visual Studio. But I use Microsoft's Arduino Extension with Visual Studio Code . I think you should too. Here's why:  1. It's free - as in beer. Zero dollars. Gratis. I know the other tools are also free, but the functionality of this plugin with Visual Studio Code only compares to other projects that you have to pay for - or endure nag screens. No nag screens here. It's also not limited. Some of the other solutions have limits on the size of either the files or the executable.    2. It's Open Source. Not just the extension, but Visual Studio Code is too. You can actually get the source for either right f...

Using GIT with Arduino

Image
  What is GIT? The term GIT doesn't actually mean anything. It was made up. But what it is, is a "version control system". That sounds complicated, but really all it boils down to is that it saves versions of your files, and gives you a way to revert back to old versions - if necessary.  It also provides a way for multiple developers to work on the same project, and even to keep the same project 'in sync' between computers no matter where they are. Where do I get it?  In order to use GIT, you need to install it. Many IDE's come with it pre-installed, but unfortunately, the Arduino IDE does not. You can find downloads for Windows, Mac, or Linux here: https://git-scm.com/downloads I will note, however, that GIT is generally a Command-Line tool. There are GUI's also available on the same website. If you need a GUI, then you can get one there. You should first learn the basic commands for GIT before using a UI though.  Once you download and install it, you can...